Cypress
It’s a test automation tool, similar to Selenium WebDriver, WebDriverIO, TestCafe, and others.
Cypress is a web test automation framework; it helps developers and testers to create web automation scripts using JavaScript. JavaScript is popular with the Developer audience also. Just like other web automation frameworks, Cypress automation also has these stages.
1. Set up tests
2. Script the tests
3. Test Run
4. Debug the Tests.
Cypress is compared with Selenium, but their architecture is different. Cypress does not have a lot of restrictions as selenium has. It makes Cypress create your automation web scripts faster and easier. Using Cypress anything can be tested which is running on a Browser, following testing can be automated by Cypress
- Unit testing
2. Integration testing
3. End-to-end testing
Why is this tool generating so much interest?
1. Cypress is also an Open-source test automation tool for testing web applications.
2. Cypress is the new standard in front-end testing that every developer and QA engineer needs.
3. Cypress helps developers and testers to create web automation scripts using JavaScript.
Architecture
Automation tools like Selenium work by running outside the browser. However, Cypress has a different architecture. It runs within the browser. Cypress is based on the server — Node.js.
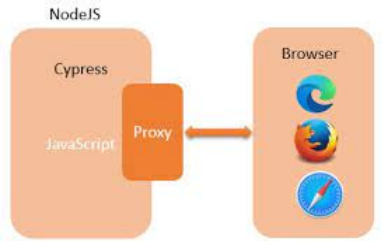
There is a continuous interaction of Cypress with the Node.js and they work in coordination with each other. As a result, Cypress can be utilized for testing both the front and backend of the application.
Cypress is thus capable of handling the tasks performed in real-time on the UI and simultaneously can also perform the actions outside of the browser.
Reasons to Use Cypress
1. Cypress gives a fast and stable test execution as compared to other automation tools because of its Architectural design.
2. Cypress has the feature of screenshot capturing while test execution. It can also capture the video of the test suite if it is running from the command line Interface.
3. In the Developer tools section, it gives debugging option which helps developers to debug fast and in an easy.
4. Unlike other tools where wait and sleep are used to achieve synchronization in test runs, Cypress has an inbuilt feature which waits by default until the next action and waits before moving to the next step.
5. In Cypress we can see the response time of an activity which is useful for a unit testing perspective.
6. Cypress can be used with CI tools [Continues Integration tools-Jenkins].
7. With the help of the Viewport sizing feature, cypress can check the responsiveness of a web page.
8. Cypress provides test case status in a clear format; it displays the count of test cases which are passed or failed.
9. Cypress has a good capability of error logging, which clearly describes the reason for any error or failure.
10. Cypress has good documentation support, which helps developers and testers to write critical tests.
Advantages of Cypress
1. Cypress framework captures snapshots at the time of test execution. This allows QAs or developers to hover over a specific command in the Command Log to see exactly what happened at that step.
2. One does not need to add explicit or implicit wait commands in test scripts, unlike Selenium. Cypress waits automatically for commands and assertions.
3. Developers or QAs can use Spies, Stubs, and Clocks to verify and control the behaviour of server responses, functions, or timers.
4. The automatic scrolling operation ensures that an element is in view before performing any action (for example Clicking on a button)
5. Earlier Cypress supported only Chrome testing. However, with recent updates, Cypress now provides support for Firefox and Edge browsers.
6. As the programmer writes commands, Cypress executes them in real-time, providing visual feedback as they run.
7. Cypress carries excellent documentation.
Limitations of Cypress
- One cannot use Cypress to drive two browsers at the same time
2. It does not provide support for multi-tabs
3. Cypress only supports JavaScript for creating test cases
4. Cypress does not provide support for browsers like Safari and IE now.
5. Limited support for iFrames
Cypress Environment Setup
For Cypress environment setup, follow the steps below
Step:1 — Install node.js
visit the link: https://nodejs.org/en/download/
The screen that will appear is given below
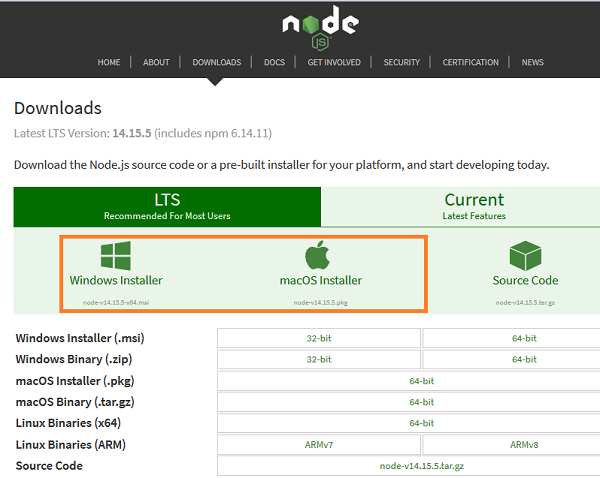
There shall be both Windows and macOS installers. We must get the package as per the local operating system.
For a 64- bit Windows configuration, the following pop-up comes up to save the installer.
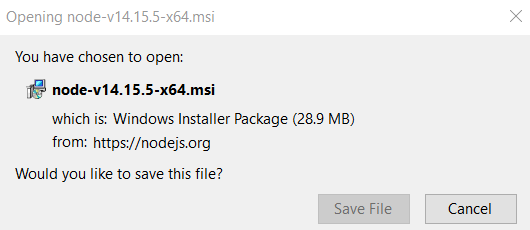
Once the installation is done, a NodeJS file gets created in the Program Files. The path of this file should be noted. Then, enter the path in environment variables.
Once the path of the node.js file is set.
You can check the node version and npm version in the command prompt.
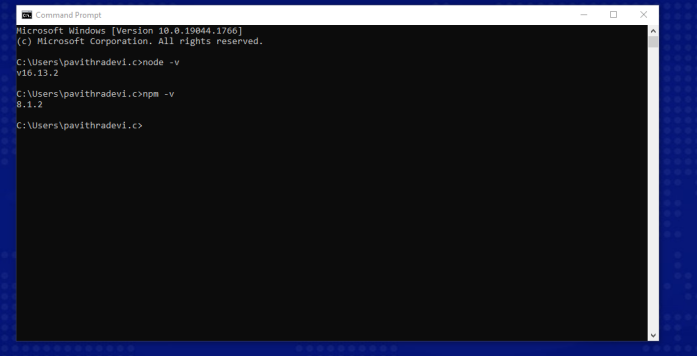
Next, we need to have a JavaScript editor to write the code for Cypress.
Step:2 — Install Visual Studio code
Visit the link to download the Visual studio code — https://code.visualstudio.com/download
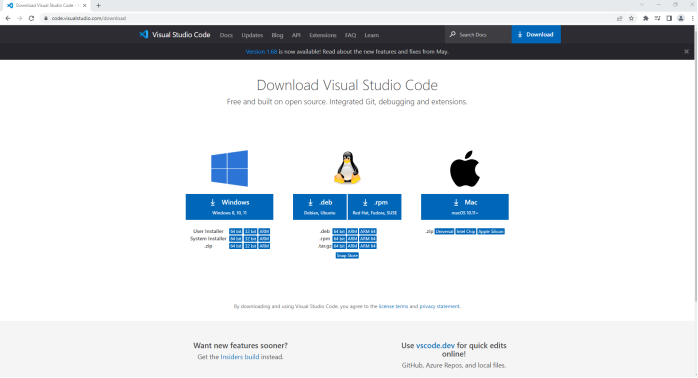
From there you can choose the package based on the Operating system.
Once the executable file is downloaded, and all the installation steps are completed, the Visual Studio Code gets launched.
Step:3 — Create a new folder for Cypress Automation Project
we shall create an empty folder (say cypress) in any desired location.

Step:4 — Open the folder in Visual Studio code
Select the option Open Folder from the File menu. Then, add the Cypress folder (that we have created before) to the Visual Studio Code.
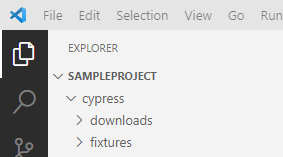
Step:5 — Open VS code terminal and run the command npm init -y
This command is an initialize, and it is used to make a package.json file for your project frontend. A package.json file is a file that contains information about the project’s packages and dependencies. It also contains metadata for the project such as version number, author, and description.
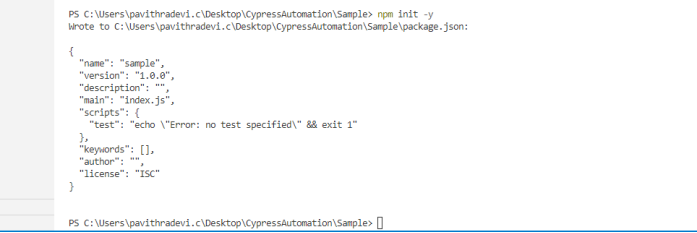
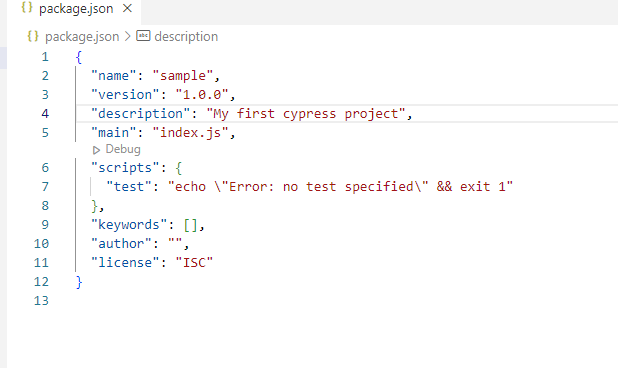
Once done, the package.json file gets created within the project folder with the information we have provided.
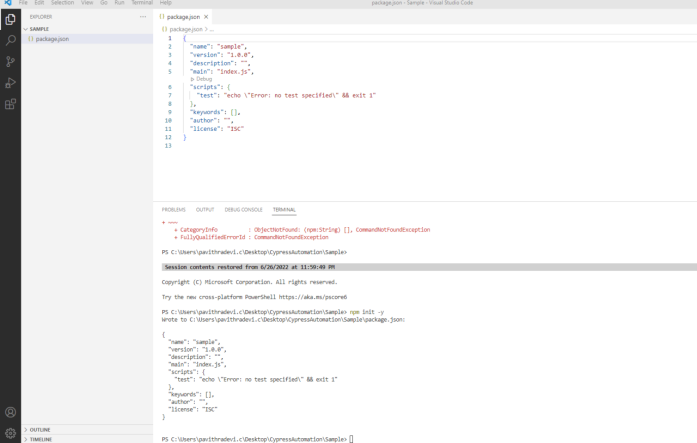
In package.json, you can give the description like My first cypress project.
Step:6 — Install Cypress npm install cypress
This will install Cypress locally as a dev dependency for your project. During the installation, we can ignore all warnings and notices that we get. Once the installation is successful, we could see a node modules folder and a package-lock.json file being created.

Step:7 — You can check the cypress version by using the command npx cypress -v or npx cypress -version
Using this command, we can verify what cypress packages we installed are and what version is

Step:8 — Open cypress using npx cypress open
This command will open the cypress window. Cypress will automatically find and allow you to use the browsers installed on your system. If found, the specified browser will be added to the list of available browsers in the Cypress App.
With the help of the cypress window, we can run the scripts.
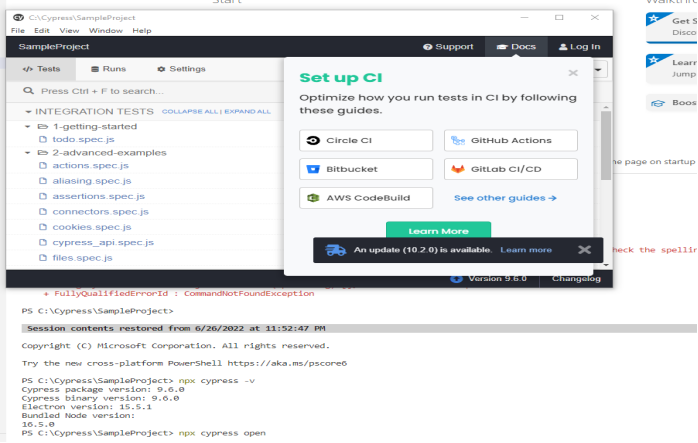
If you face any problems after using the npx cypress open command. Use this command npx cypress verify and then use npx cypress open
You can see the project structure.
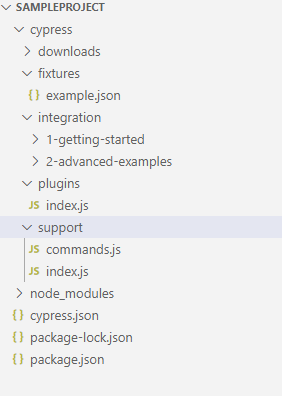
Cypress Folder Structure:
After installing Cypress, it will create a recommended folder structure for you. There are four significant folders:
1. Fixtures
2. Integration
3. Plugins
4. Support
1. Cypress Fixtures Folder
We use this folder to store data objects or external pieces of static data that we use throughout the tests; you will be typically using them with cy.fixture command. Usually, the data is stored in JSON format.
Fixtures − Test data in form of key-value pairs for the tests are maintained here.
2. Cypress Integration Folder
The next folder is integration; This is the main folder to store all your test. We add the Basic, End to End Test, Visual or Cucumber test here. All your spec files will be here. Test file can be written as .js, .jsx, .coffee and .cjsx.
Earlier, we executed the script from this example folder; From the example folder, you can refer to different commands in Cypress; this will be extremely helpful during our script development.
Integration − Test cases for the framework are maintained here.
3. Cypress Plugins Folder
It has its own index.js file. Put here your custom plugin code. You can find different plugins on the cypress.io website. The plugin file is a particular file that executes in Node before the project is loaded, before the browser launches, and during your test execution.
While the Cypress tests execute in the browser, the plugin file runs in the background Node process, giving your tests the ability to access the file system and the rest of the operating system by calling the cy.task() command.
The plugins file is an excellent place to define how you want to bundle the spec files via the preprocessors, find and launch the browsers via the browser launch API, and other things.
Plugins − Cypress events (prior and post events to be executed for a test) are maintained here.
4. Cypress Support Folder
There are two files inside the support folder: commands.js and index.js
1.command.js: is the file where you add your commonly used functions and custom commands. It includes functions you may call to use in different tests, such as the login function. Cypress created some functions for you, and you can override them here if you want.
2. index.js: This file runs before every single spec file. This file is a suitable place to put global configuration and behavior that modifies Cypress like before or before each. By default, it imports only commands.js, but you can import or require other files to keep things organized.
Cypress recommends the above folder. However, you can modify the folder configuration in your configuration file. cypress.json is the main configuration file; you can override different default settings for Cypress here.
Support − Reusable methods or customized commands, which can be utilized by test cases directly, without object creation are created here.
Apart from the above four folders, we have a few Asset Folders like Screenshot, Download, and Video to store different related files, which we will discuss later.
node modules − Project dependencies from the npm are maintained in this folder. It is the heart of the Cypress project execution.
cypress.json − Default configurations are set in this folder. The values of the current configurations can be modified here, which overrules the default configurations.
package.json − Dependencies and scripts for the projects are maintained in this folder.
First Test:
Cypress has adopted Mocha’s syntax for the development of test cases, and it uses all the fundamental harnesses that Mocha provides. Below are a few of the main constructs which we majorly use in Cypress test development:
Basic Commands:
1- cy.visit(): to navigate to the specific website
2 - cy.contains(): to get the dom element containing text
3 - cy.log(): to display cypress console logs during execution
4 - cy.get(): to get dom element in cypress
5 - cy.url(): to Get the current URL
6 - describe(): It is simply a way to group our tests. It takes two arguments, the first is the name of the test group, and the second is a callback function.
7 - context(): It is just an alias for describe ().
8 - it(): We use it for an individual test case. It takes two arguments, a string explaining what the test should do, and a callback function which contains our actual test.
9 - .type(): Type into a DOM element.
10 - before(): It runs once before all tests in the block.
11 - after(): It runs once after all tests in the block.
12 - beforeEach(): It runs before each test in the block.
13 - afterEach(): It runs after each test in the block.
14 - cy.only(): To run a specified suite or test, append “. only” to the function.
15 - cy.skip(): To skip a specified suite or test, append “. skip()” to the function.
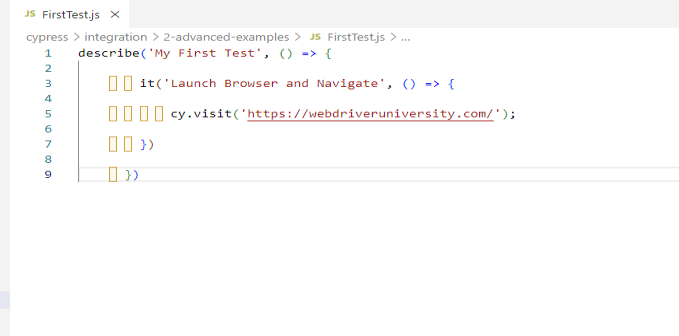
You can write the test in the Integration folder
First, add a new file named “FirstTest.js” under the “advanced-examples” folder, by right-clicking on the folder and selecting the option “New File”:
Test Execution:
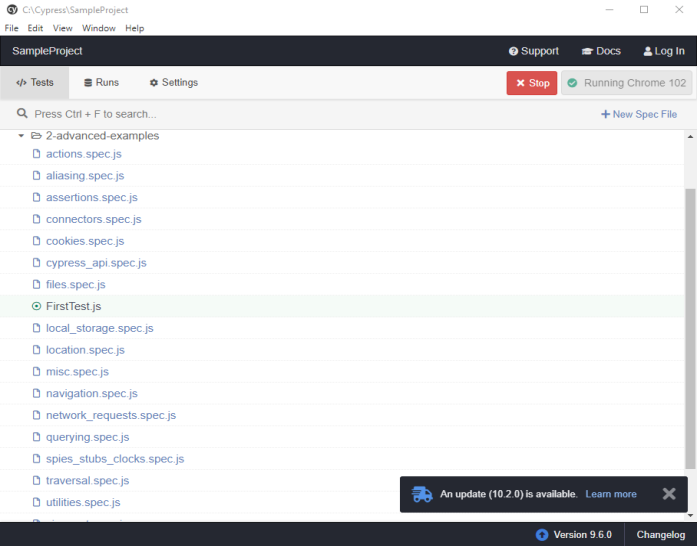
After you open Cypress using the npx cypress open command in Terminal, the Test Runner window will open, which will show the test case “FirstTest.js”, as shown below.
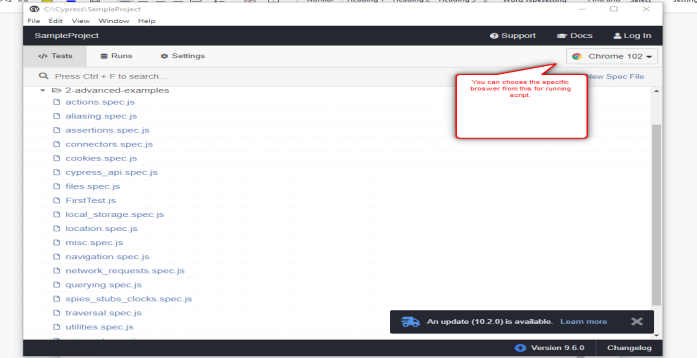
The Cypress Test Runner tries to find all compatible browsers on the user’s machine. The drop-down to choose a different browser is in the top right corner of the Test Runner.
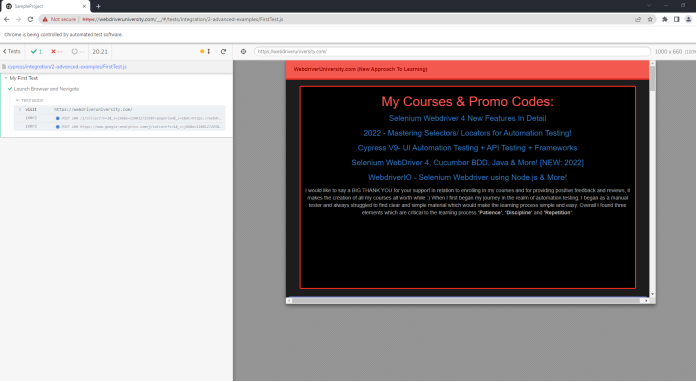
Now, to run the test case that we created in our previous tutorial which was FirstTest.js, just click on the test case on the runner window as highlighted in the above screenshot, it will open the browser and will run all the steps in the test case. You will see a screen below showing the execution of the test case:
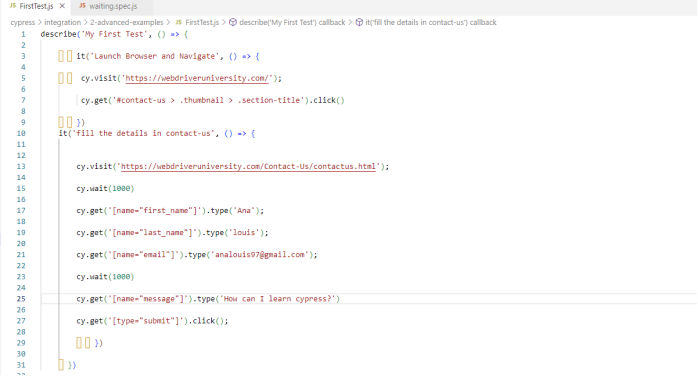
Second Test:
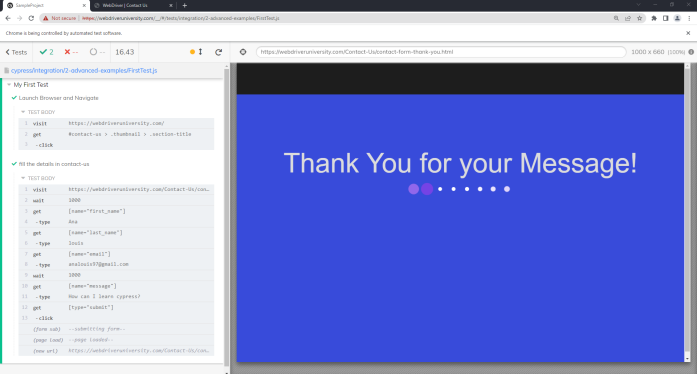
The Script is written Positive Test Case filling all the details in contact-us.
Below is the output of the Test Script filling all the details in contact-us.
Third Test Case:
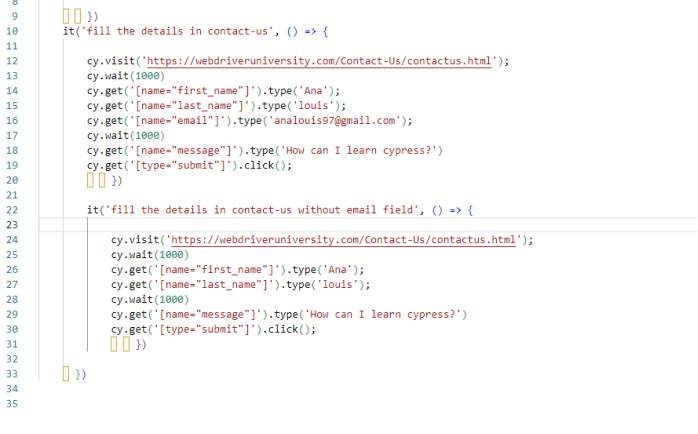
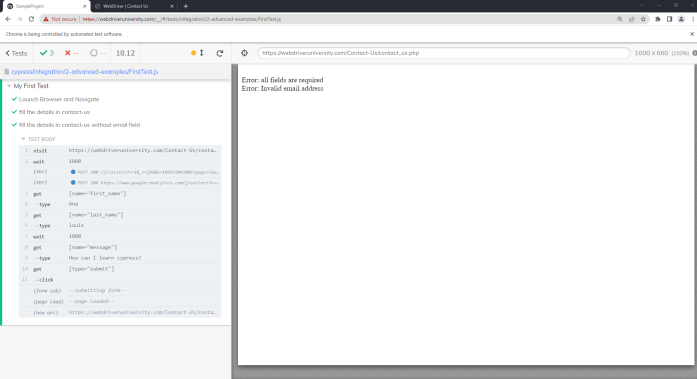
The script is written Negative Test Case without filling email field in contact-us.
Below is this output of the Test Script without filling the email field in contact-us.
Conclusion:
Cypress is a great tool for those who want to create useful end-to-end tests with little effort. It supports the testing of all types of web elements easily using powerful in-built commands. Cypress provides you with a visual interface to indicate whether the test commands have been successfully executed, passed, or failed
Thanks, and I hope this article helps you.

No comments:
Post a Comment