efore we go further into the JUnit framework, let’s talk a little about Unit Testing.
Unit testing, as the name suggests, refers to the testing of small segments of code. Here, a unit indicates the smallest bit of code that can be fetched out of the system. This small bit can be a line of the code, a method, or a class. The smaller the chunk of code, the better it is, as smaller chunks will tend to run faster. And this provides a better insight into the code and its performance.
JUNIT
JUnit is a unit testing framework for the Java programming language. JUnit has been important in the development of test-driven development and is one of a family of unit testing frameworks collectively known as xUnit, that originated with JUnit. The unit promotes the idea of “first testing then coding”, which emphasizes setting up the test data for a piece of code that can be tested first and then implemented. This approach is like “test a little, code a little, test a little, code a little”. It increases the productivity of the programmer and the stability of program code, which in turn reduces the stress on the programmer and the time spent on debugging.
Features of JUnit
1. Open Source Framework
2. Provide Annotation — To identify test methods
3. Provides Assertion — For Testing expected results
4. Provides test runners — Running tests
5. Improves Code quality — It allows faster code writing, which results in an increase in the code’s quality.
6. Automated Test Running — The test results do not require manual checking. All the tests run automatically on JUnit.
7. Easily interpretable Results — The test results are represented interactively by showing test progress in a bar, thus making them easily interpretable.
How to install JUnit in Eclipse
Part 1: Create Maven Project
File->click new ->Maven->maven project ->next ->dialog box will appear.
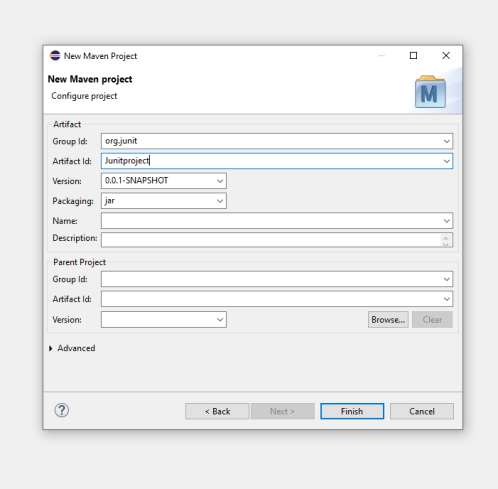
It asks for group id, artifact name.

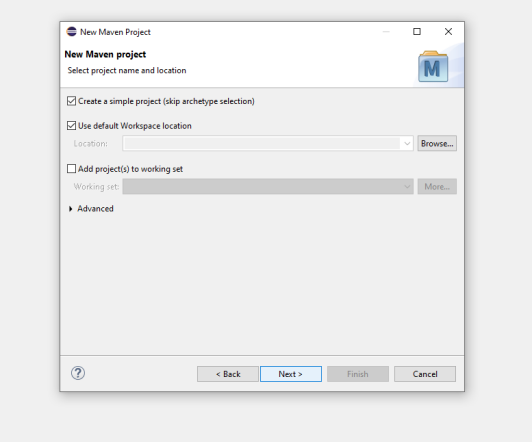
Group id represents package name
Artifact id represents class name
Then click finish
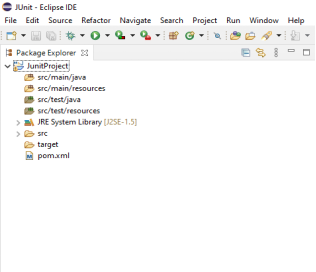
Now you will see a structured project gets built.
Why we prefer maven project than java project means,
- Maven can add all the dependencies required for the project automatically by reading the pom file.
2. One can easily build their project to a jar, war etc. as per their requirements using Maven.
3. Maven makes it easy to start a project in different environments and one doesn’t need to handle the dependencies injection, builds, processing, etc.
4. Adding a new dependency is very easy. One has to just write the dependency code in the pom file.
Part 2: Add Dependencies for JUnit in pom.xml

Part 3: verify Junit setup
You can create a simple JUnit test to verify JUnit setup. See below test class:
Step 1: Create a java class named TestJUnit.java and provide a simple assert statement.
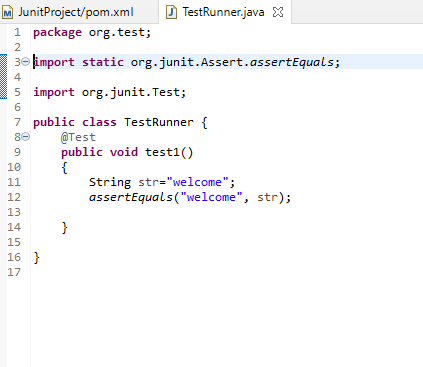
Step 2: To execute the test, follow below steps:
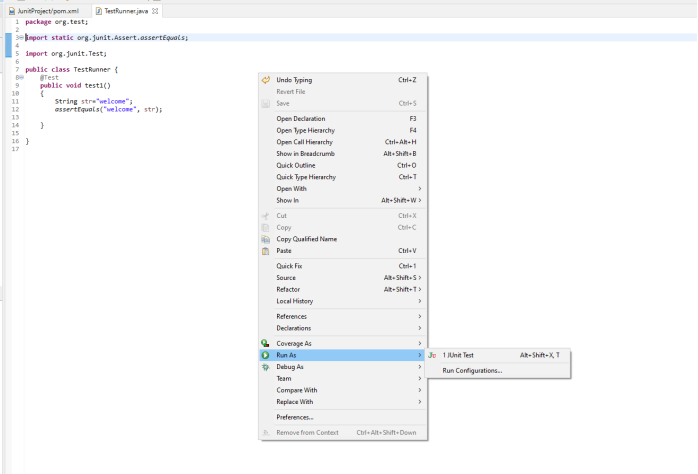
1.Right click on TestRunner.java and click on “Run As” as shown below
2.Another window will be open once you click on “Run As”, click on “1 JUnit Test” as shown below:
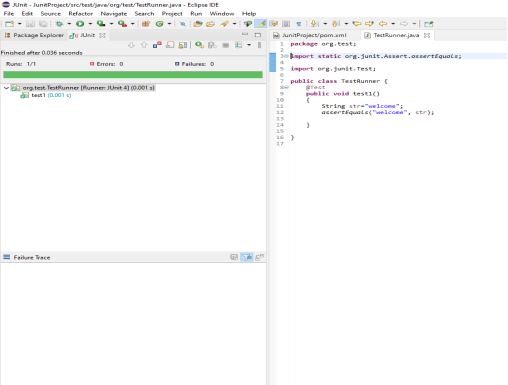
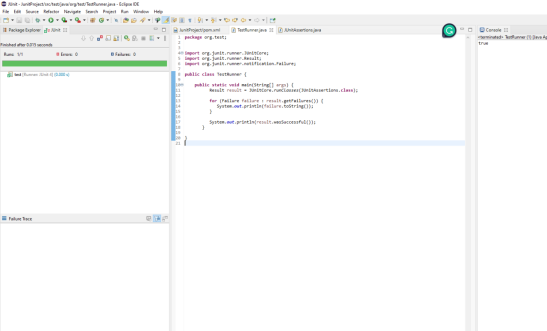
Step 4: Here is the output or result for your test. If it is successfully executed, it will show a green check mark in front of it.
JUnit Annotations:
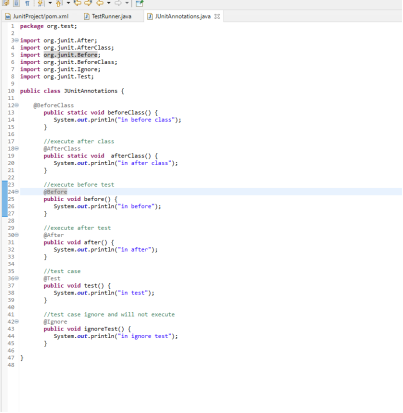
1.@Test
The Test annotation tells JUnit that the public void method to which it is attached can be run as a test case.
2.@Before
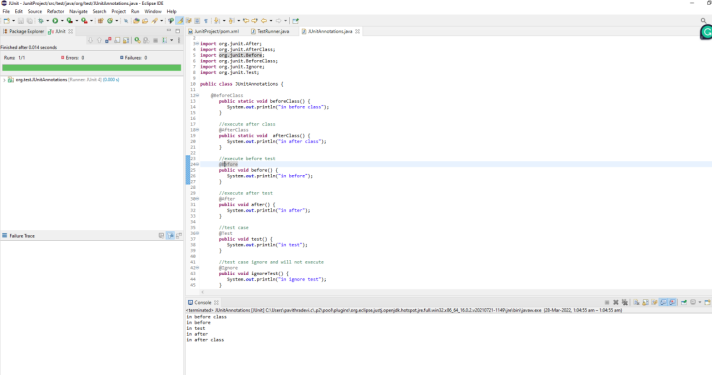
Several tests need similar objects created before they can run. Annotating a public void method with @Before causes that method to be run before each Test method.
3.@After
If you allocate external resources in a Before method, you need to release them after the test runs. Annotating a public void method with @After causes that method to be run after the Test method.
4.@BeforeClass
Annotating a public static void method with @BeforeClass causes it to be run once before any of the test methods in the class.
5.@AfterClass
This will perform the method after all tests have finished. This can be used to perform clean-up activities.
6.@Ignore
The Ignore annotation is used to ignore the test and that test will not be executed.
JUnit Assertion
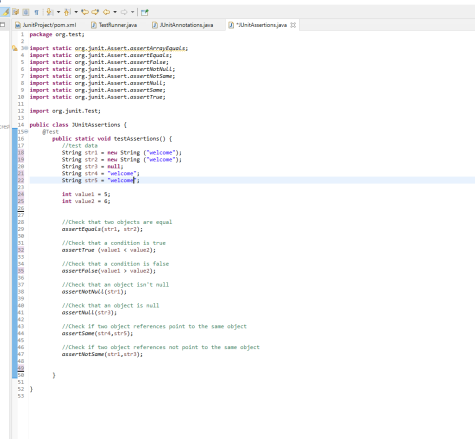
Assert is a method useful in determining Pass or Fail status of a test case, The assert methods are provided by the class org.junit.Assert which extends java.lang.Object class.There are various types of assertions like Boolean, Null, Identical etc.
Junit provides a class named Assert, which provides a bunch of assertion methods useful in writing test cases and to detect test failure. The assert methods are provided by the class org.junit.Assert which extends java.lang.Object class. Some of the Assertions methods:
1.void assertEquals(boolean expected, boolean actual)
Checks that two primitives/objects are equal.
2.void assertTrue(boolean condition)
Checks that a condition is true.
3.void assertFalse(boolean condition)
Checks that a condition is false.
4.void assertNotNull(Object object)
Checks that an object isn’t null.
5.void assertNull(Object object)
Checks that an object is null.
6.void assertSame(object1, object2)
The assertSame() method tests if two object references point to the same object.
7.void assertNotSame(object1, object2)
The assertNotSame() method tests if two object references do not point to the same object.
8.void assertArrayEquals(expectedArray, resultArray);
The assertArrayEquals() method will test whether two arrays are equal to each other.
JUnit Test Runner and Test Suites
If we want to execute multiple tests in a specified order, it can be done by combining all the tests in one place. This place is called as the TestRunner. More details on how to execute test suites and how it is used in JUnit will be covered in this Article.
1.JUnitCore class is used to execute these tests.
2.A method called runClasses provided by org.junit.runner.JUnitCore, is used to run one or several test classes.
3.Return type of this method is the Result object (org.junit.runner.Result), which is used to access information about the tests. See the following code example for more clarity.
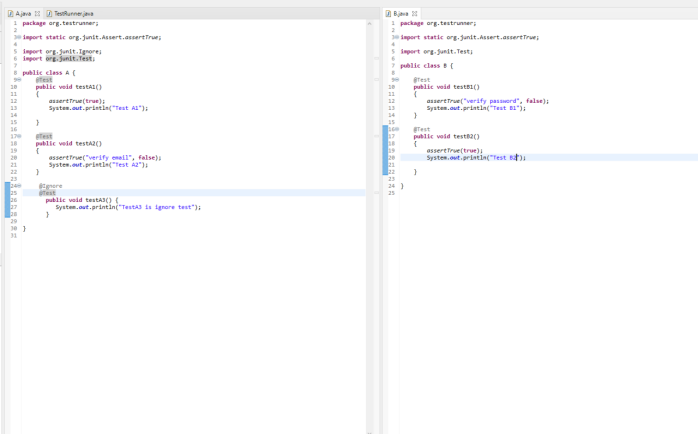
1. Created 2 classes (A.java and B.java)
A.java and B.java
We need to create a test class with a test method annotated with @Test and @Ignore as given below:
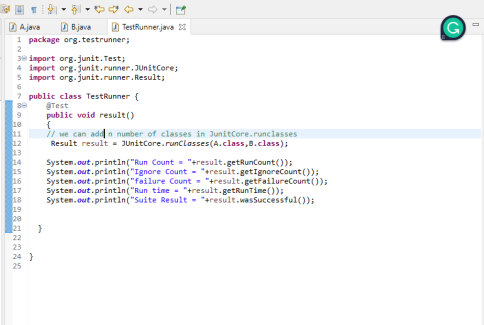
2.To execute our test method (above) ,we need to create a test runner.
In the test runner we have to add test class as a parameter in JUnitCore’s runclasses() method. It will return the test result, based on whether the test is passed or failed.
And we used some methods like getRunCount(), getIgnoreCount(), getFailureCount(), getRunTime(), wasSuccessful() in import org.junit.runner.Result
a. getRunCount() — It will give how many test method is executed
b. getIgnoreCount() — It will give how many test method is ignored using @Ignore annotation
c. getFailureCount() — It will give how many test method is failed
d. getRunTime() — It will give how much time is taken to execute test method in ms
e. wasSuccessful() — It will give Suite is True or False
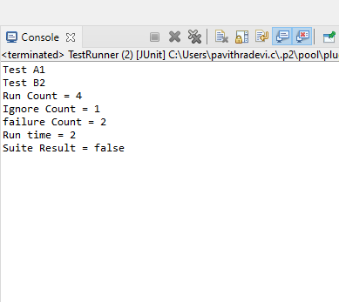
2. To create a testSuite you need to first annotate the class with
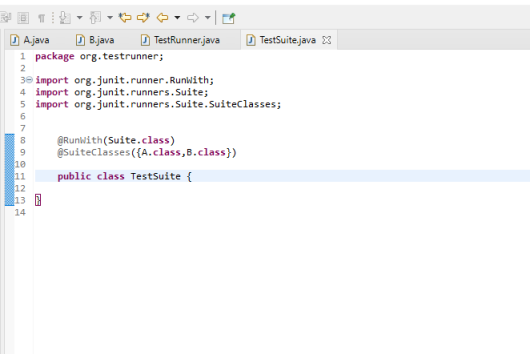
@RunWith(Suite.class) and @SuiteClasses(class1.class2…..).
TestSuite.java is a simple class annotated with @RunWith and @Suite annotations. You can list out number of .classes in the suite as parameters as given below:
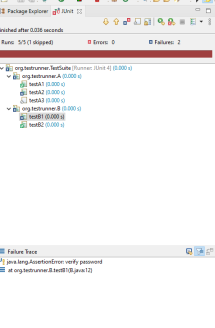
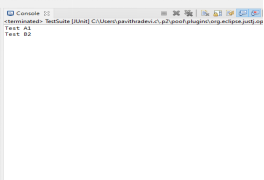
After executing TestSuite.java which contains a suite having A.java and B.java, you will get below output:

No comments:
Post a Comment