Monday, September 23, 2024
Performance Testing: Goal-oriented and Realistic Load Scenarios testing using Webload.
1 Introduction
Performance testing is a crucial aspect of ensuring that your web applications can handle the expected user load without compromising speed, reliability, and user experience. Among the various performance testing tools available, WebLoad stands out for its ability to create goal-oriented and realistic load scenarios.
In this article, we’ll explore how WebLoad can help you achieve performance excellence by simulating real-world usage and setting specific performance goals.
1.1 Radview WebLoad
WebLOAD is a load-testing tool developed by RadView Software in 1997. It is used to perform stress testing and performance testing of web applications. WebLOAD can generate reliable and real-life load scenarios even for the most complex systems. It combines performance, integrity, and scalability as a single process for the verification of web and mobile applications.

Architecture:
WebLOAD tests Web applications by generating Virtual Clients that simulate real world loads. By increasing the number of Virtual Clients, you increase the load on the system. You create visual JavaScript-based test scripts that define the behavior of the Virtual Clients and WebLOAD executes these test scripts, monitoring the application response graphically and statistically, and presenting the test results in real time.
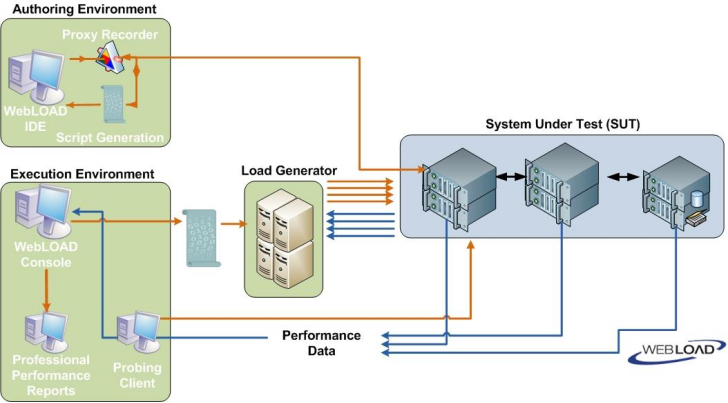
It incorporates functional verification into the scalability testing process allowing you to accurately verify the scalability and integrity of your Web applications at the per-client, per-transaction, and per-instance level under defined load conditions.
Load Machines are hosts that run Load Generator software simulating multiple Virtual Clients simultaneously accessing your System Under Test (SUT). One Load Machine can run multiple Load Generators.
The tests consist of multiple simultaneous requests made by Virtual Clients (which emulate Web browsers) to Web servers. Load Machines can run multiple threads.
The System Under Test (SUT) is where the Web system under test resides. The SUT does not require that WebLOAD software be installed on it.
The Console sets up, runs, and controls a test session. At the Console, you can:
i) Define the hosts participating in the load test.
ii) Specify the test scripts that the load test executes.
iii) Schedule tests.
iv) View performance reports.
1.2 Advantages of WebLoad
User-friendly: WebLOAD is known for its user-friendly interface and flexibility4.
Automatic correlation: It automatically correlates dynamic values such as session IDs, enabling scripts to be executed dynamically with multiple virtual clients2.
Load generation: WebLOAD can generate load from on-premises machines or from the cloud.
1.3 Key Features Goal-Oriented and Realistic Testing
Scripting and Recording: WebLoad offers scripting and recording capabilities that enable testers to create test scenarios by interacting with the application, just like real users would. This feature simplifies the process of building realistic load scenarios.
Parameterization: With WebLoad, you can parameterize your tests, allowing for dynamic inputs and data variations. This feature is essential for creating diverse and realistic load scenarios.
Distributed Testing: WebLoad supports distributed testing, which means you can generate load from multiple geographic locations to simulate the diverse user base of your web application.
Goal-Based Testing: The tool enables you to set performance goals such as response time targets or error rate thresholds. WebLoad then provides detailed reports on whether your application met these goals.
Resource Monitoring: WebLoad offers comprehensive resource monitoring, allowing you to track server resources, database performance, and other critical metrics during testing. This helps identify resource-related bottlenecks.
2 Getting started with WebLoad
2.1 Creating a script
The first step in creating a script is to record your actions as you interact with your Web application.
- Start WebLOAD Recorder by search and select from Start
2. Select ‘Create a new project’.
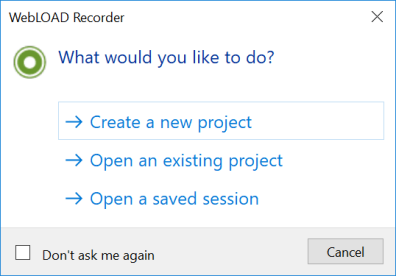
3. In the main window go to Editing Mode and click ‘Start’ to Record
4. Select the Browser from dropdown and enter the URL in ‘URL address’ field.
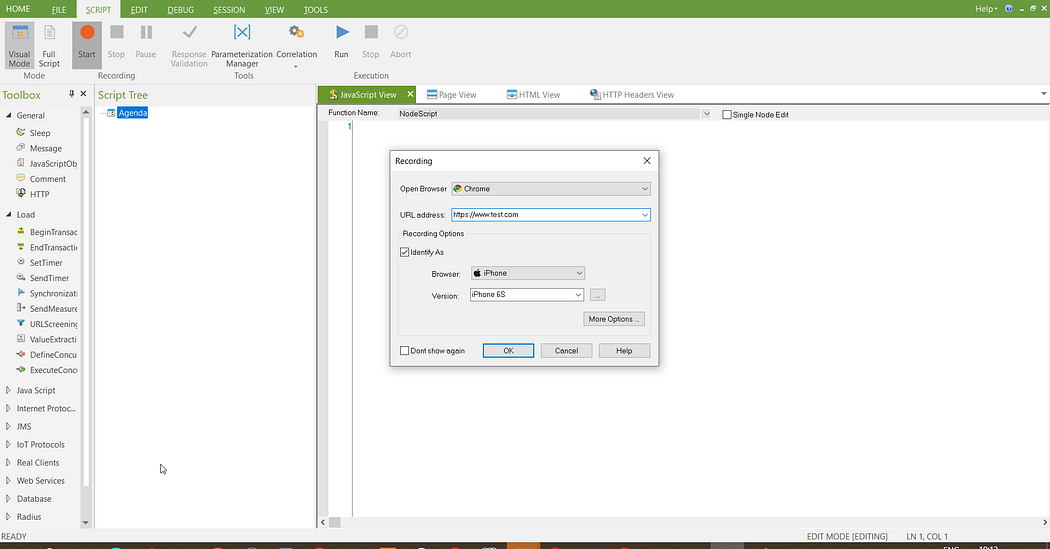
5. Once the recording is completed, the scripts recorded will be displayed as scripts in JavaScript view. Other views such as Page view, HTML view and HTTP headers views can also be switched to verify as required.
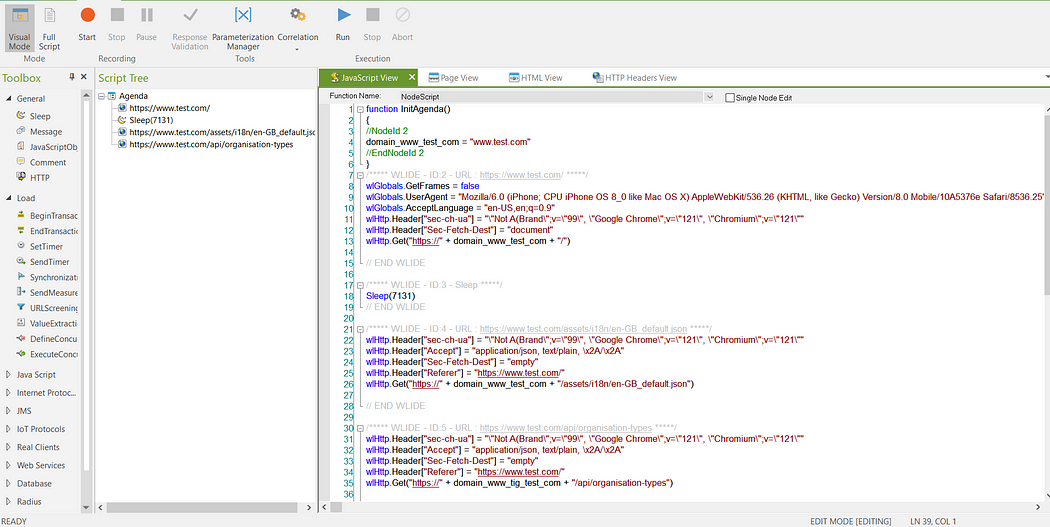
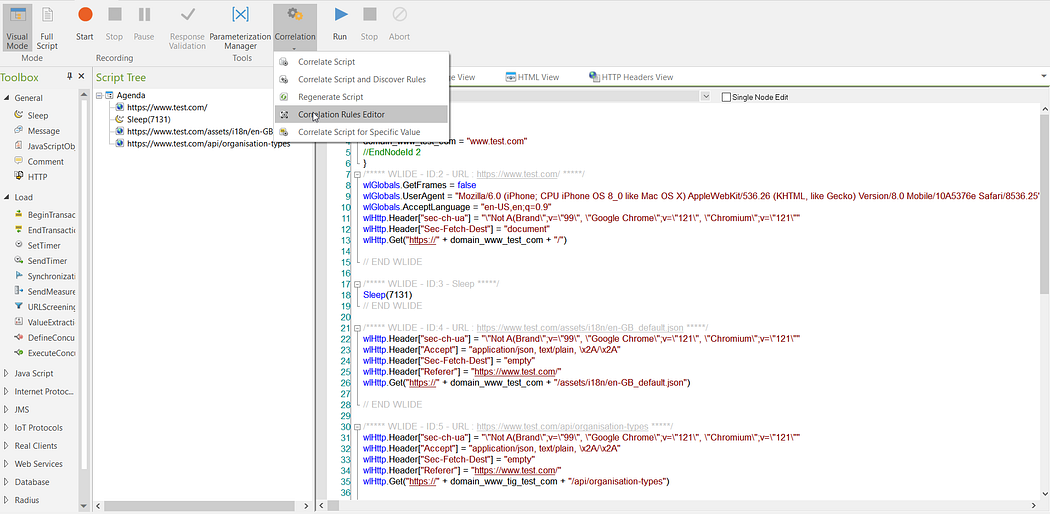
6. Correlation:
Correlation of variable values can attain through the option ‘Correlation rules editor’ which is under ‘Correlation’ option.
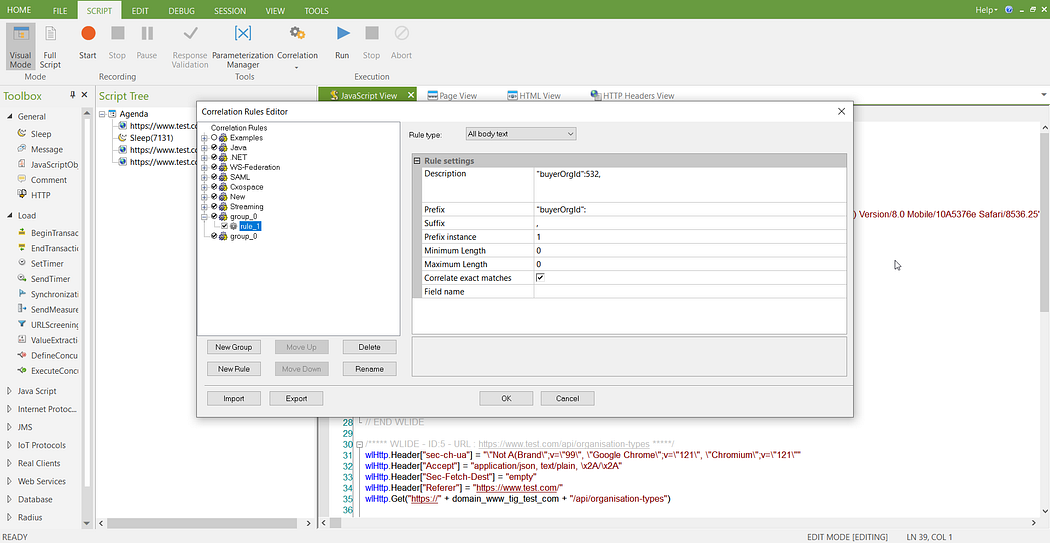
We can also create a correlation value under a group and use it for a future purpose by providing prefix and suffix for particular request.
7. Save the script and open Webload Console from ‘Tools’ option.
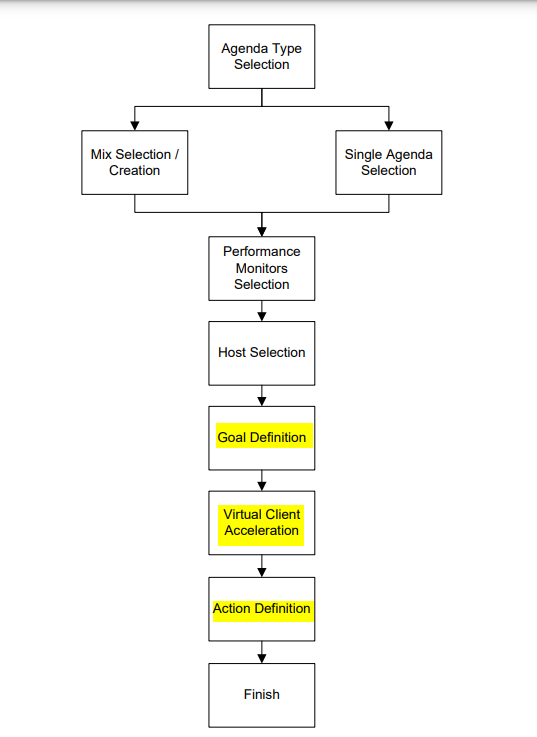
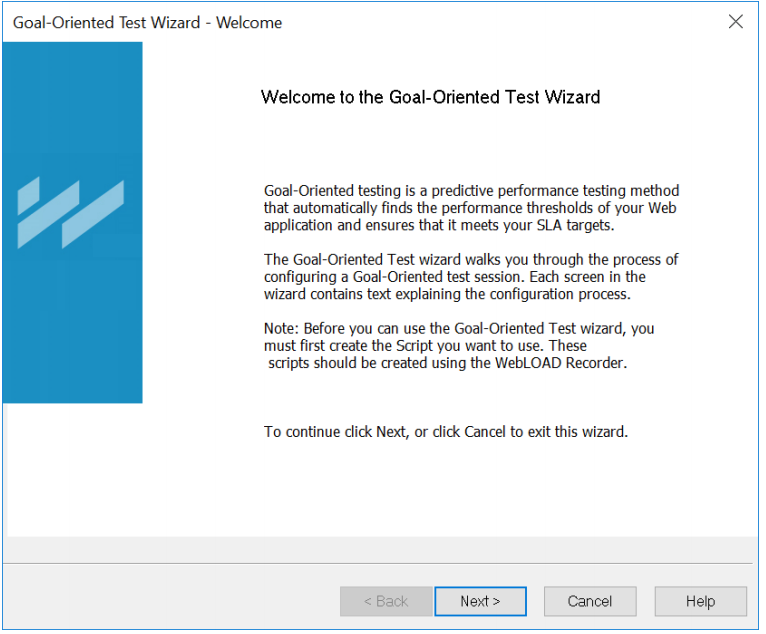
8. Select ‘Goal-Oriented Test Wizard’ from the Console shortcut dialog box
9. WebLOAD Console supports two types of scripts:
Single Scripts — lone test-scripts.
Mix of Scripts — combination of scripts .
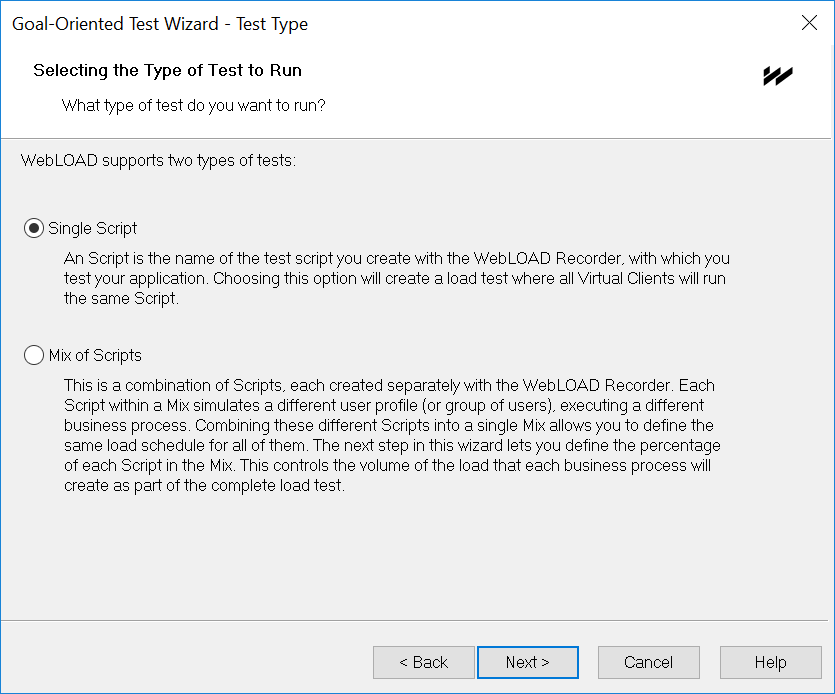
10. Select ‘Single script’ and click ‘Next’.
11. Select the source of the script by clicking 3 dot button.
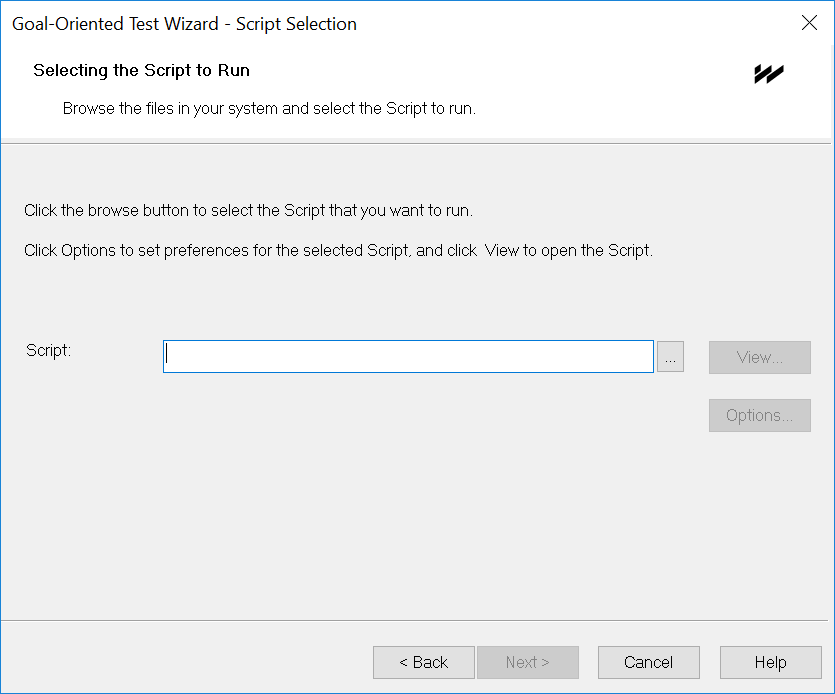
12. Add a goal in the Goal-Oriented Test Wizard prompt
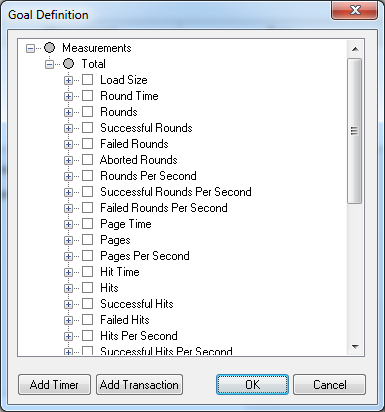
The Goal Definition dialog box enables you to define the performance goals for the Goal-Oriented test. The defined goals are displayed at the top of the dialog box where you can see at a glance all of the participants in the test, the measurements being tested and the goals to be achieved.
13. To configure the goal:
. Click Add Goal.
The Goal Definition window is displayed.
. Select Response Time from the list of measurements and click OK.
. Because the goal is for the Response Time not to exceed five seconds, select the
operator >= and the Goal Value 5 by modifying the Op and Goal Value cells.
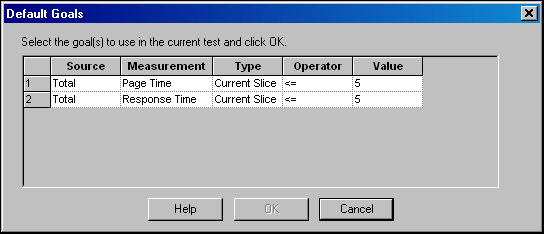
. Click the slider and move up and down the scale to select an acceleration rate.

14. Define WebLOAD Console’s response once the test goals are reached.

15. Finish the Goal Oriented wizard by setting up the values:

3. Goal-Oriented Result
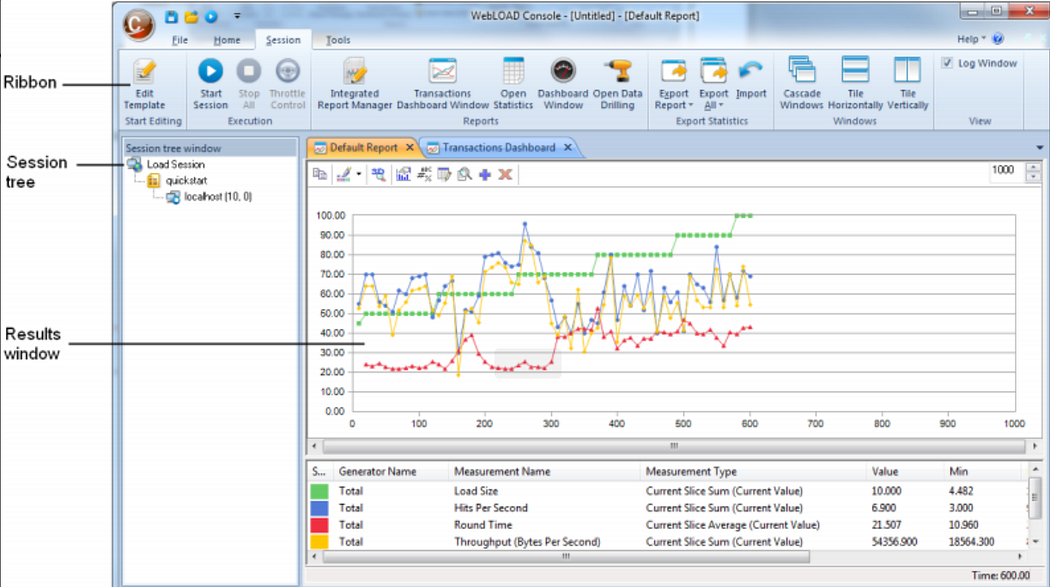
When running a Goal-Oriented test session, the WebLOAD Goal-Oriented Test Report opens in Chart View.
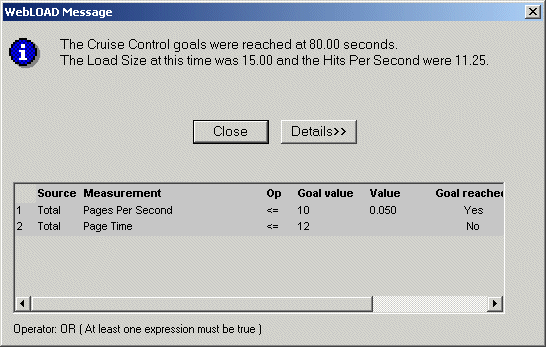
The Goal-Oriented Test Session continues running until the performance goals are achieved. When the performance goals are reached, WebLOAD Console displays a message box with the test results.

Click Details to verify the original goal settings and statistics for them.
3. Best Practices for Using WebLoad
Provide some tips and best practices for leveraging WebLoad effectively in creating goal-oriented and realistic load scenarios.
Start with clear objectives: Before creating load scenarios, define your performance goals and objectives. These could include target response times, acceptable error rates, and expected user loads.
Capture real user behavior: Use WebLoad’s recording and scripting capabilities to capture actual user interactions. This will help you replicate real-world scenarios accurately.
Parameterize your tests: Make your load scenarios dynamic by parameterizing data inputs. This ensures that your tests are not limited to fixed values and can mimic varying user inputs.
Monitor and analyze: Continuously monitor your application’s performance during testing. Use WebLoad’s resource monitoring to identify bottlenecks and areas for optimization.
4. Conclusion
WebLoad’s ability to create goal-oriented and realistic load scenarios makes it a powerful tool for achieving performance excellence in web applications. By simulating real-world user behavior and setting specific performance objectives, you can identify and address performance issues proactively, ensuring that your web application delivers a seamless user experience even under heavy loads.
